Version 6.33
Making a Verified Return of merchandise
A Verified Return is a return transaction that is linked to the original sale. Such linking allows for easy verification that the merchandise was sold to the customer as well as transferring item details – such as fees and discounts – from the sale to the return.
To make a Verified Return, in POS Pro:
-
On the Home Screen, tap New Sale.
-
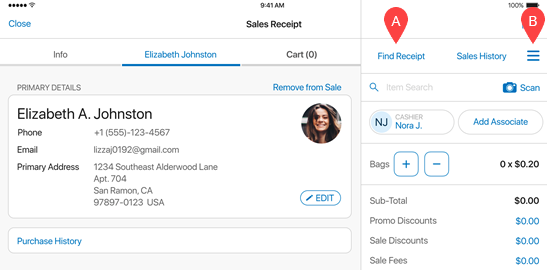
In the Sales Receipt area, tap Find Receipt at the top of the right-side panel (A in the screenshot below) or in the fly-out menu (B):
Alternatively, if you have no physical sales receipt on hand, it’s possible to search for the original transaction in the following POS areas:
Customer > [selected customer] > Purchase HistorySales Receipt > Sales HistorySales Receipt > Device History
-
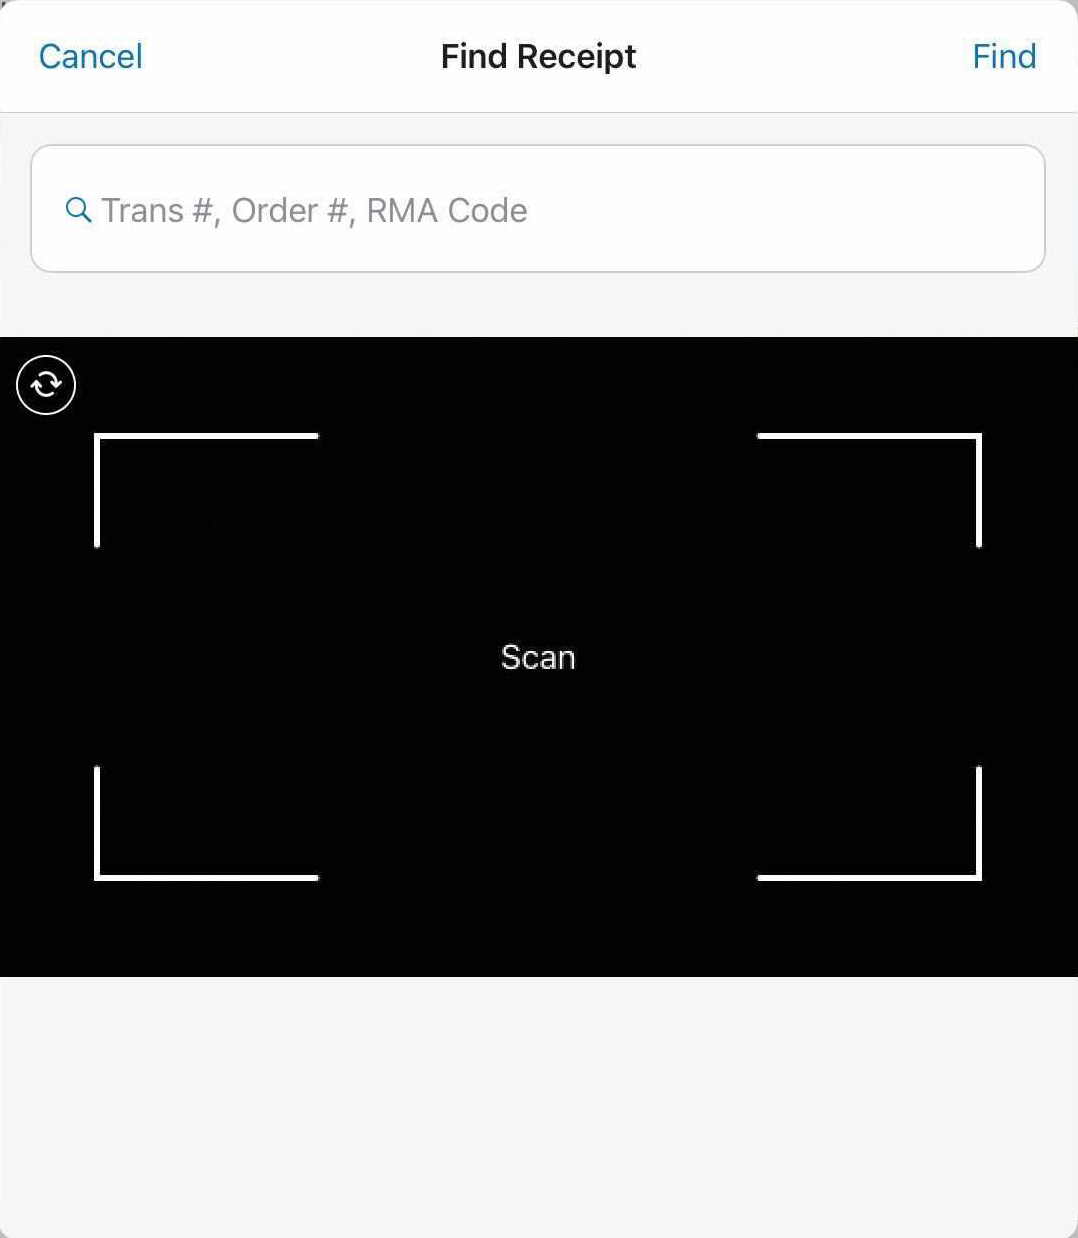
In the Find Receipt area, find the original receipt by:
-
In the Return area that opens:
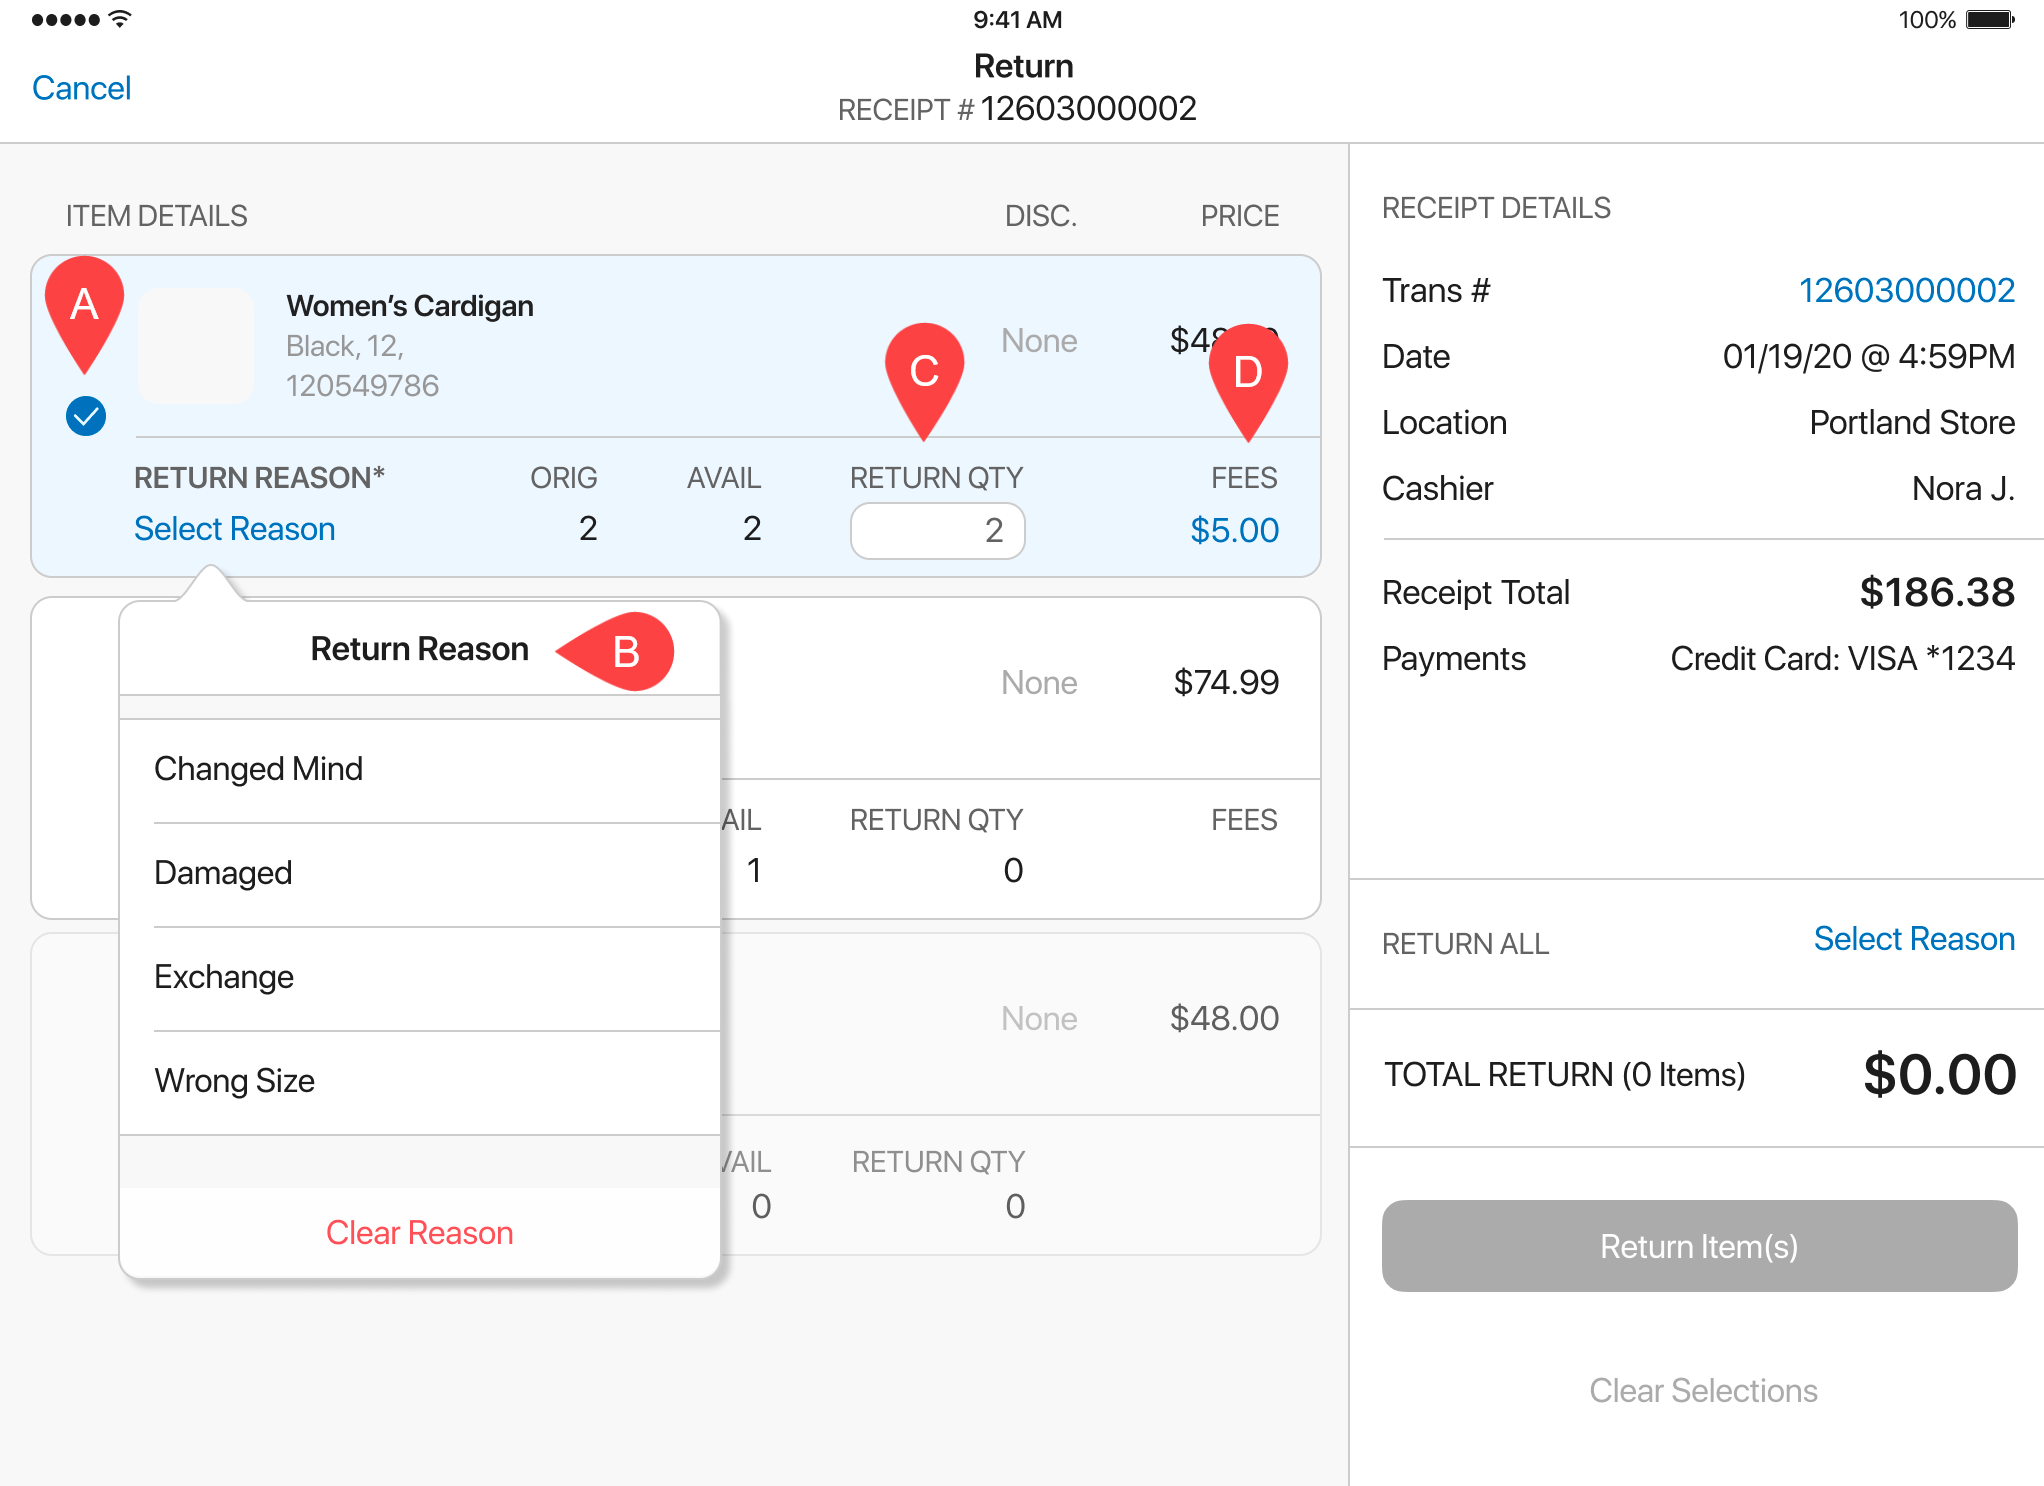
- Tap the item(s) that should be returned. Items included in the verified return display as blue rows with a checkmark icon (A in the screenshot above).
- In the Return Reason pop-over that appears, select a return reason (B).
- To define the return quantity, tap the RETURN QTY field in an item’s row (C).
- To edit the fees that are to be returned, tap the FEES value (D).
- When all return items are configured, tap Return Item(s) at the bottom-right.
-
Back in the Sales Receipt area, tap Payment at the bottom-right. In the Payment area, choose the required refund method and complete the refund.
-
Tap Finalize at the bottom-right.
Making a refund to a single credit card
When the customer is returning merchandise that was originally paid with a credit card, a refund to that particular credit card may be required.
To make a refund to a credit card, in POS Pro:
- Find the original sale transaction and open it – the Return area will appear. In the Return area, choose the required item(s) and then tap Return Item(s) at the bottom-right. For details, see Making a verified return of merchandise.
- In the Sales Receipt area, tap Payment at the bottom-right.
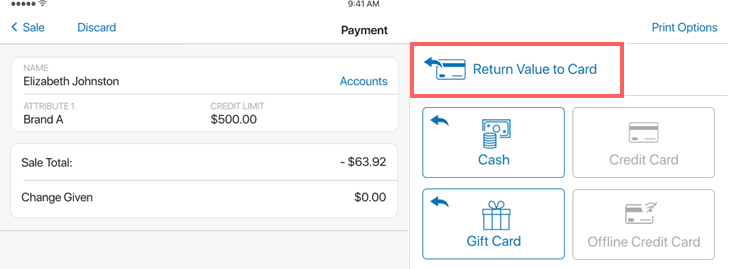
- In the Payment area, tap Return Value to Card:
- The Return Value to Card(s) dialog will automatically show the card that was used in the original transaction. Enter the amount to be refunded in the AMOUNT field:
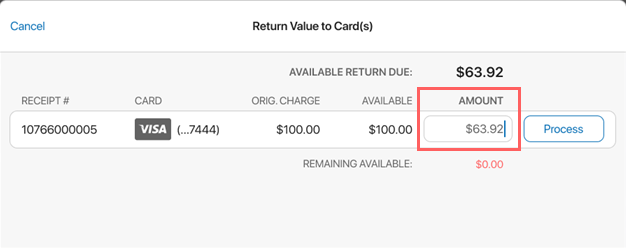
Please note that the AMOUNT value cannot exceed the AVAILABLE value shown in the adjacent column.
- Tap Process.
- In the confirmation dialog, tap Yes:
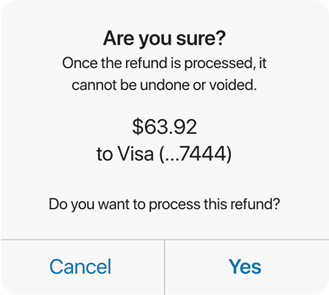
- After the transaction is approved, tap Close on the Approved screen:
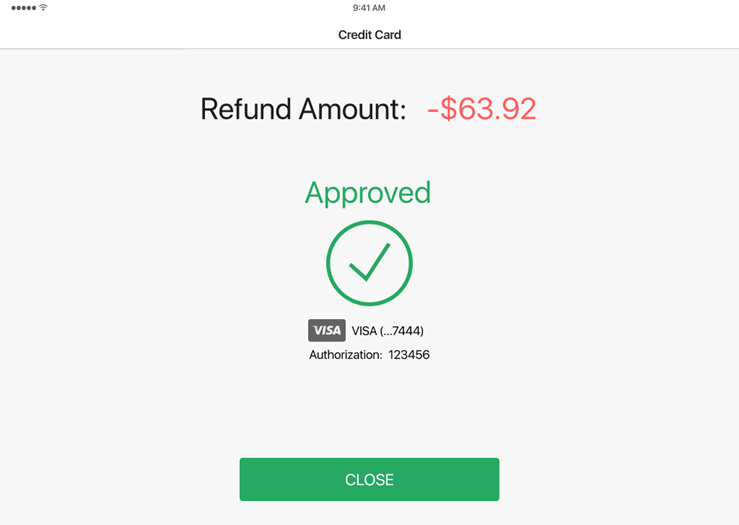
- Back in the Payment area, tap Finalize at the bottom-right.
Making a refund to multiple credit cards
When the customer is returning merchandise that was originally paid with several credit cards, a refund to each credit card may be required.
To make a refund to multiple credit cards, in POS Pro:
- Find the original sale transaction and open it – the Return area will appear. In the Return area, choose the required item(s) and then tap Return Item(s) at the bottom-right. For details, see Making a verified return of merchandise.
- In the Sales Receipt area, tap Payment at the bottom-right.
- In the Payment area, tap Return Value to Card:

- The Return Value to Card(s) dialog will automatically show the cards that were used in the original transaction. In the dialog, define how much will be refunded to each card by:
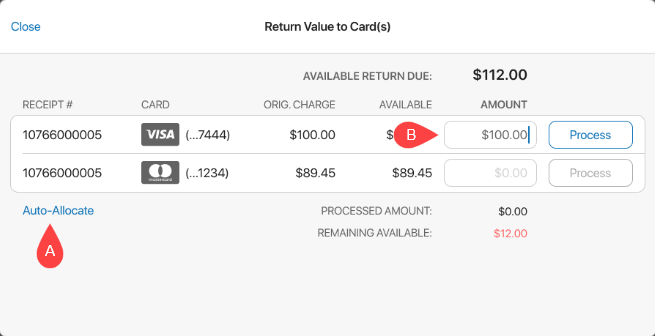
- tapping Auto-Allocate (A in the screenshot above), or
- manually defining the AMOUNT column for each card (B)
Please note that the AMOUNT value cannot exceed the AVAILABLE value shown in the adjacent column.
- Tap Process for one of the cards.
- In the confirmation dialog, tap Yes:

- After the transaction is approved, tap Close on the Approved screen:

- Back in the Return Value to Card(s) dialog, repeat steps 5-7 for each remaining card. Note that cards that have been successfully processed display with the
Processedicon.
When all the cards have been processed and there’s no Remaining Available amount to return, tapping Close on the Approved screen returns you to the Payment area. - In the Payment area, tap Finalize.
Returning a Gift Card
This guide describes how to complete the return of a Gift Card using the Verified Returns functionality.
A Gift Card can be returned if:
- it is active, and
- hasn’t expired or is within the grace period, and
- it has a positive balance
-
On the Home Screen, tap New Sale.
-
In the Sales Receipt area, tap Find Receipt at the top of the right-side panel (A in the screenshot below) or in the fly-out menu (B):

Alternatively, if you have no physical sales receipt on hand, it’s possible to search for the original transaction in the following POS areas:
Customer > [selected customer] > Purchase HistorySales Receipt > Sales HistorySales Receipt > Device History
-
In the Find Receipt area, find the original receipt by:
-
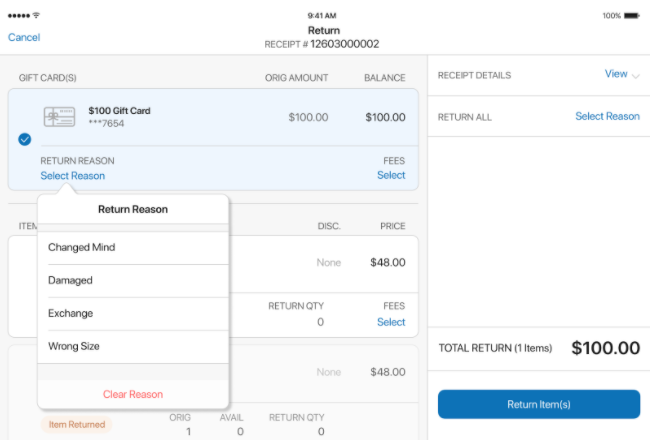
In the Return area that opens, tap the required Gift Card and then select the return reason:
-
Tap Return Item(s) at the bottom-right.
-
Back in the Sales Receipt area, tap Payment at the bottom-right. In the Payment area, choose the required refund method and complete the refund.
-
Tap Finalize.
