Finalizing Ship Memos with ShippyPro integrated
A Ship Memo can have ShippyPro defined as the shipping service. Then, in the Shipment tab, ShippyPro displays as Delivery Method.
To finalize a Ship Memo with ShippyPro:
-
Tap Shipments in the app’s Home Screen navigation panel or in the fly-out More menu (the location of the button is defined by your custom settings).
-
Once the Outgoing area of Shipments is open, find and tap the required Ship Memo.
-
In the Ship Memo, tap Shipment on the upper-right.
In the Shipment tab, enter the weight of your package in the Weight fields (required). To select weight units, tap Options on the upper-right.

Then, enter the size of the package in Dimensions (required).
Alternatively, to automatically fill out Dimensions, tap the required label of a default box size:

-
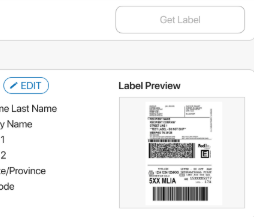
To change the ship-to address of the Ship Memo, tap EDIT (A in the screenshot below) next to the Ship To field. It is only possible to edit the ship-to address before the shipping label is retrieved.

-
Then, tap Get Label. On tapping, both shipping label and return shipping label are retrieved. On retrieving, in the Label Preview section, a preview of the shipping label displays:

-
To void labels and edit the Weight and Dimensions fields again, tap Void Labels in the Tracking # field.
-
To print the shipping label or return shipping label, tap Print on the upper-right.
-
Once finished, tap Shipped on the bottom-right to finalize the Memo.