Adding a customer and items to the sale
To create a Sales Receipt, first, you need to add a customer and sale items to it.
To do so, in POS:
-
On the Home Screen, tap New Sale.
-
In the Sales Receipt area that opens, tap the Customer tab at the top.
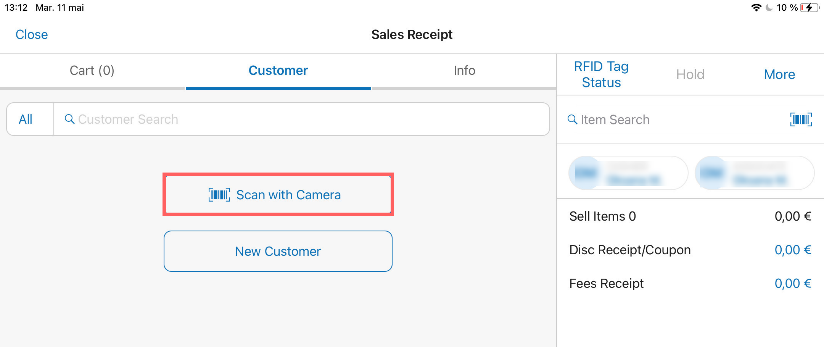
Under Customer, use the Search field at the top to find the required customer. Alternatively, to scan the customer’s member code, tap Scan with Camera below the search field.
In the list of search results, tap the required row to add that customer to the sale.
Alternatively, tap New Customer below the search field to create a new account.

- Tap the Cart tab at the top.
To scan an item and add it to the sale, tap the barcode icon next to the Item Search field in the right-side panel A .
Alternatively, use the Item Search field to add items to the sale. If an exact match is found, the item is added immediately. If multiple matching results are found, tap the required row to add that item to the sale.
To edit an item that’s been added (for example, to add a discount or a fee), swipe the item row left and then tap Edit B .
-
To add or change a cashier or associate on the sale, in the right-side panel under the Item Search field, tap Cashier or Associate, respectively.
-
Tap Pay C to proceed to the Payment area.