Outgoing: Transfer Order
Transfer Order is a request to your location to send out inventory to another location.
To confirm changes in item quantities and finish processing a Transfer Order, you will need to finalize it.
To do so, in POS Pro:
-
Tap Shipments in the app’s Home Screen navigation panel or in the fly-out More menu (the location of the button is defined by your custom settings).
-
In the Shipments area, tap Outgoing at the top of the screen.
-
In the Outgoing tab, find the required Transfer Order (TO) and tap to open it.
-
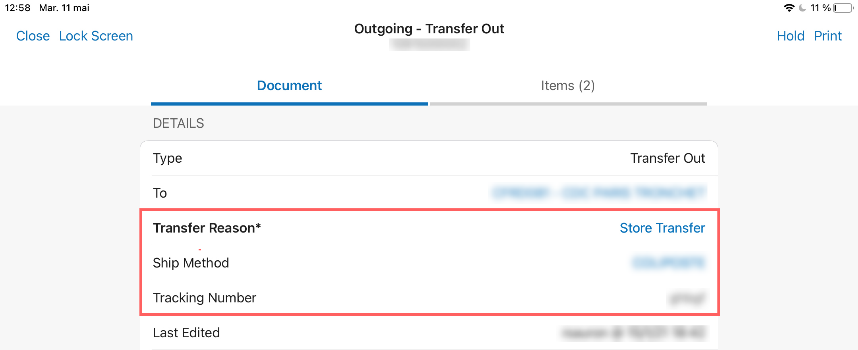
In the Document tab of the Transfer Order:
- select a transfer reason (required)
- select a ship method (required)
- enter the tracking number of your transfer (required)
-
Then, tap Items located at the top right of the screen.
-
Tapping Items will display the list of items that are to be sent out to another location.

In Items, you can do the following:
-
Tap Transfer All to include all the Transfer Order quantities (Out Qty will equal Ord Qty for
each item) -
Tap Reject All if you are unable to transfer any items (Rej Qty will equal Ord Qty for each item)
Quantity modifications are available for individual items as well. Scan in your item or enter the item’s UPC, PLU, or ALU into the Item Search field. If the item is found, the item’s Out Qty value will be increased by 1.
Also, it is possible to swipe the item row left and change Out Qty, Reject Qty, and Reject Reason. Once done, tap Save in the Edit dialog.
- Tap Finalize.