Outgoing: Ship Memo
A Ship Memo (SHIP) contains merchandise that needs to be shipped to a customer.
To finalize a Ship Memo, in POS Pro:
-
Tap Shipments in the app’s Home Screen navigation panel or in the fly-out More menu (the location of the button is defined by your custom settings).
-
In Outgoing, find the required Shipment Memo (SHIP) and tap to open it.
-
Tap Items at the top of the screen. This opens the list of merchandise that needs to be shipped to the customer.
-
Mark the items either as shipped or rejected.
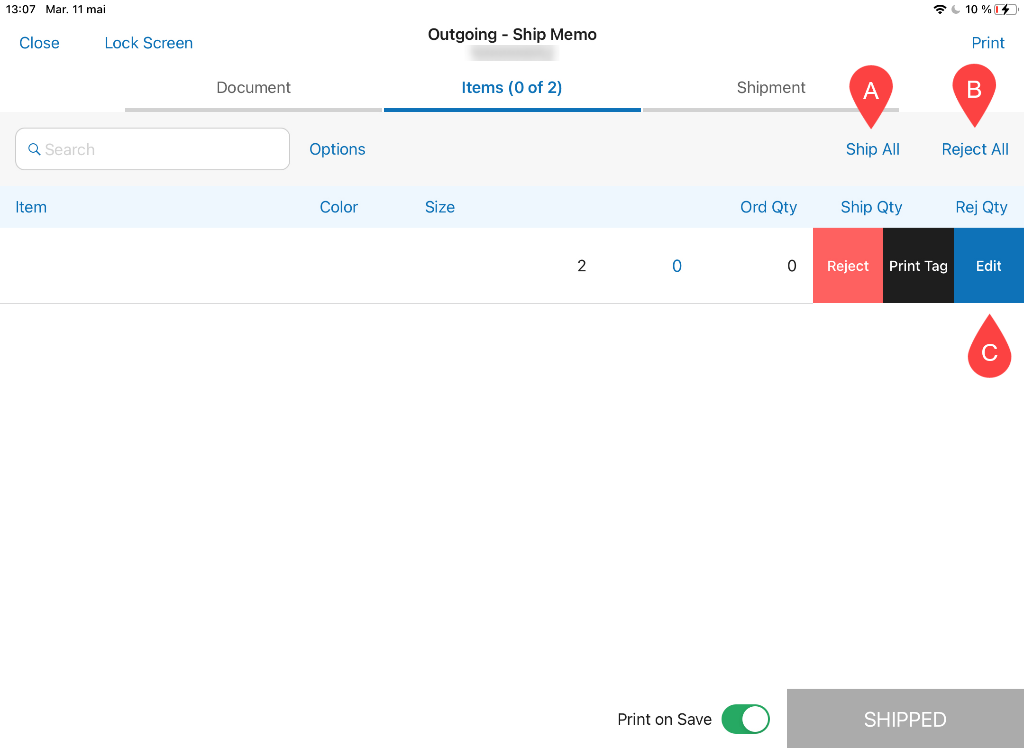 To do so, at the top right of the screen, tap Ship All
A
to mark all the Ship Memo items as shipped or Reject All
B
to reject those. On tapping Reject All, the Ship Memo will be saved with the
To do so, at the top right of the screen, tap Ship All
A
to mark all the Ship Memo items as shipped or Reject All
B
to reject those. On tapping Reject All, the Ship Memo will be saved with the Rejectedstatus.

Alternatively, it is possible to ship or reject each item manually. To do so, swipe an item’s row left and tap Edit C . In the Edit dialog that opens, define Ship Qty, Reject Qty and Reject Reason. Once done, tap Save to confirm changes.
-
Tap Shipment at the top-right of the screen. If your Delivery Method is “Manual Ship”, define Ship Method and Tracking #. If “ShipStation” or “ShippyPro”, define the weight and dimensions of the package and tap Get Label.

-
Optionally, tap Print in the upper right corner of the screen to select and print one of the documents: a Pick List, Packing Slip, Shipping Label, or Mailing Label.

To automatically print the selected document on saving, turn the Print on Save switch on.
- Tap Shipped.