Making a Verified Return of merchandise
A Verified Return is a return transaction that is linked to the original sale. Such linking allows for easy verification that the merchandise was sold to the customer as well as transferring item details – such as fees and discounts – from the sale to the return.
To make a Verified Return, in POS Pro:
-
On the Home Screen, tap New Sale.
-
In the Sales Receipt area, tap Find Receipt at the top of the right-side panel A or in the fly-out menu B :

Alternatively, if you have no physical sales receipt on hand, it’s possible to search for the original transaction in the following POS areas:
Customer > [selected customer] > Purchase HistorySales Receipt > Sales HistorySales Receipt > Device History
-
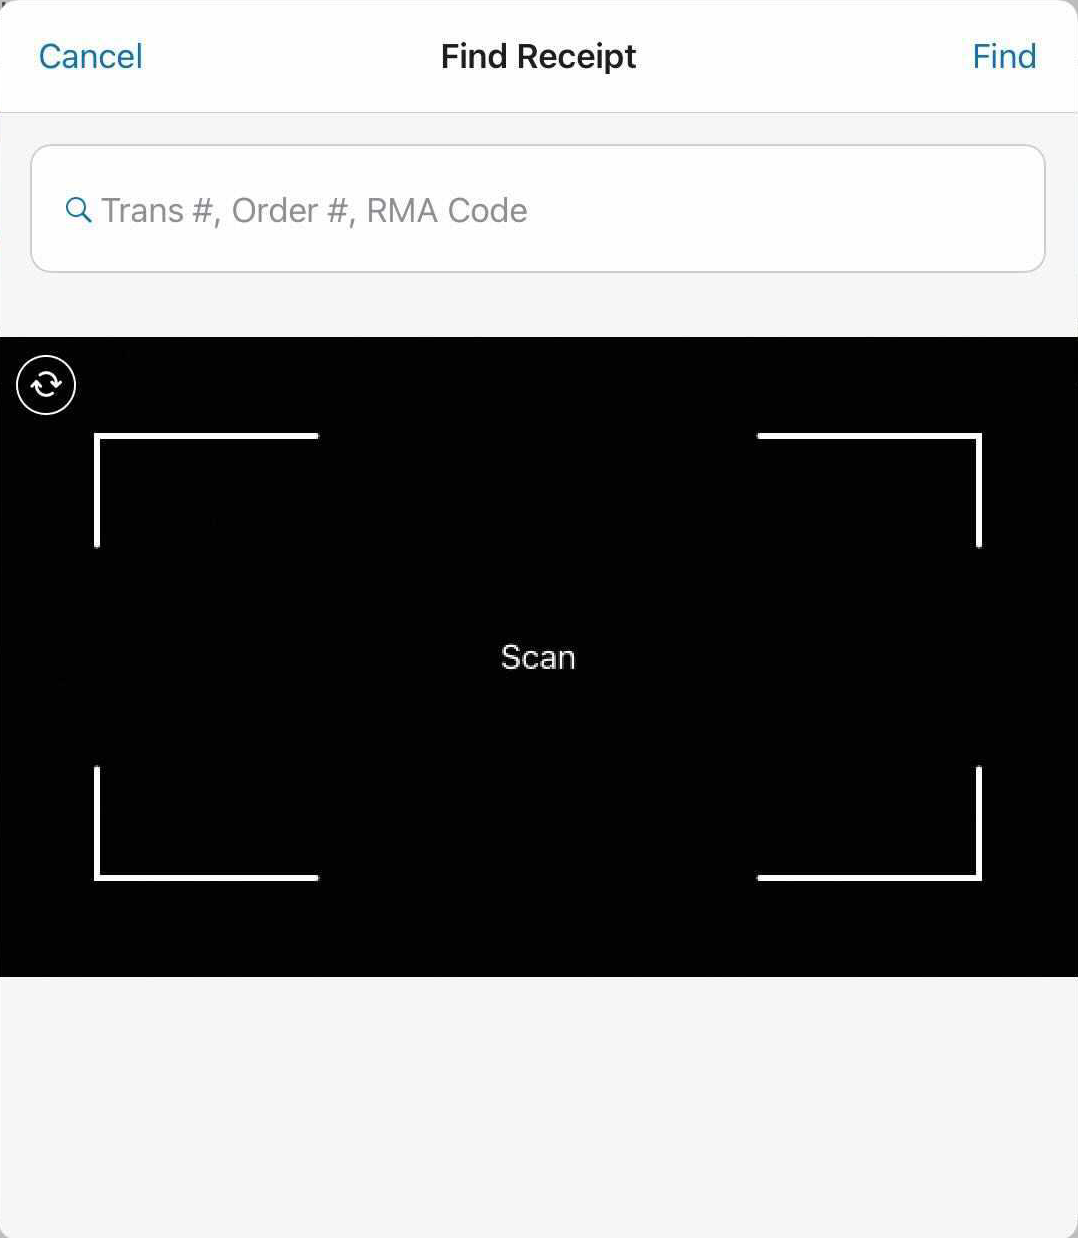
In the Find Receipt area, find the original receipt by:
- tapping Scan A and scanning the physical receipt with the camera, or
- manually entering the Transaction #, Web Order #, or RMA Code from the receipt into the Search field. You can choose the search criteria by tapping the button next to the search bar
B

-
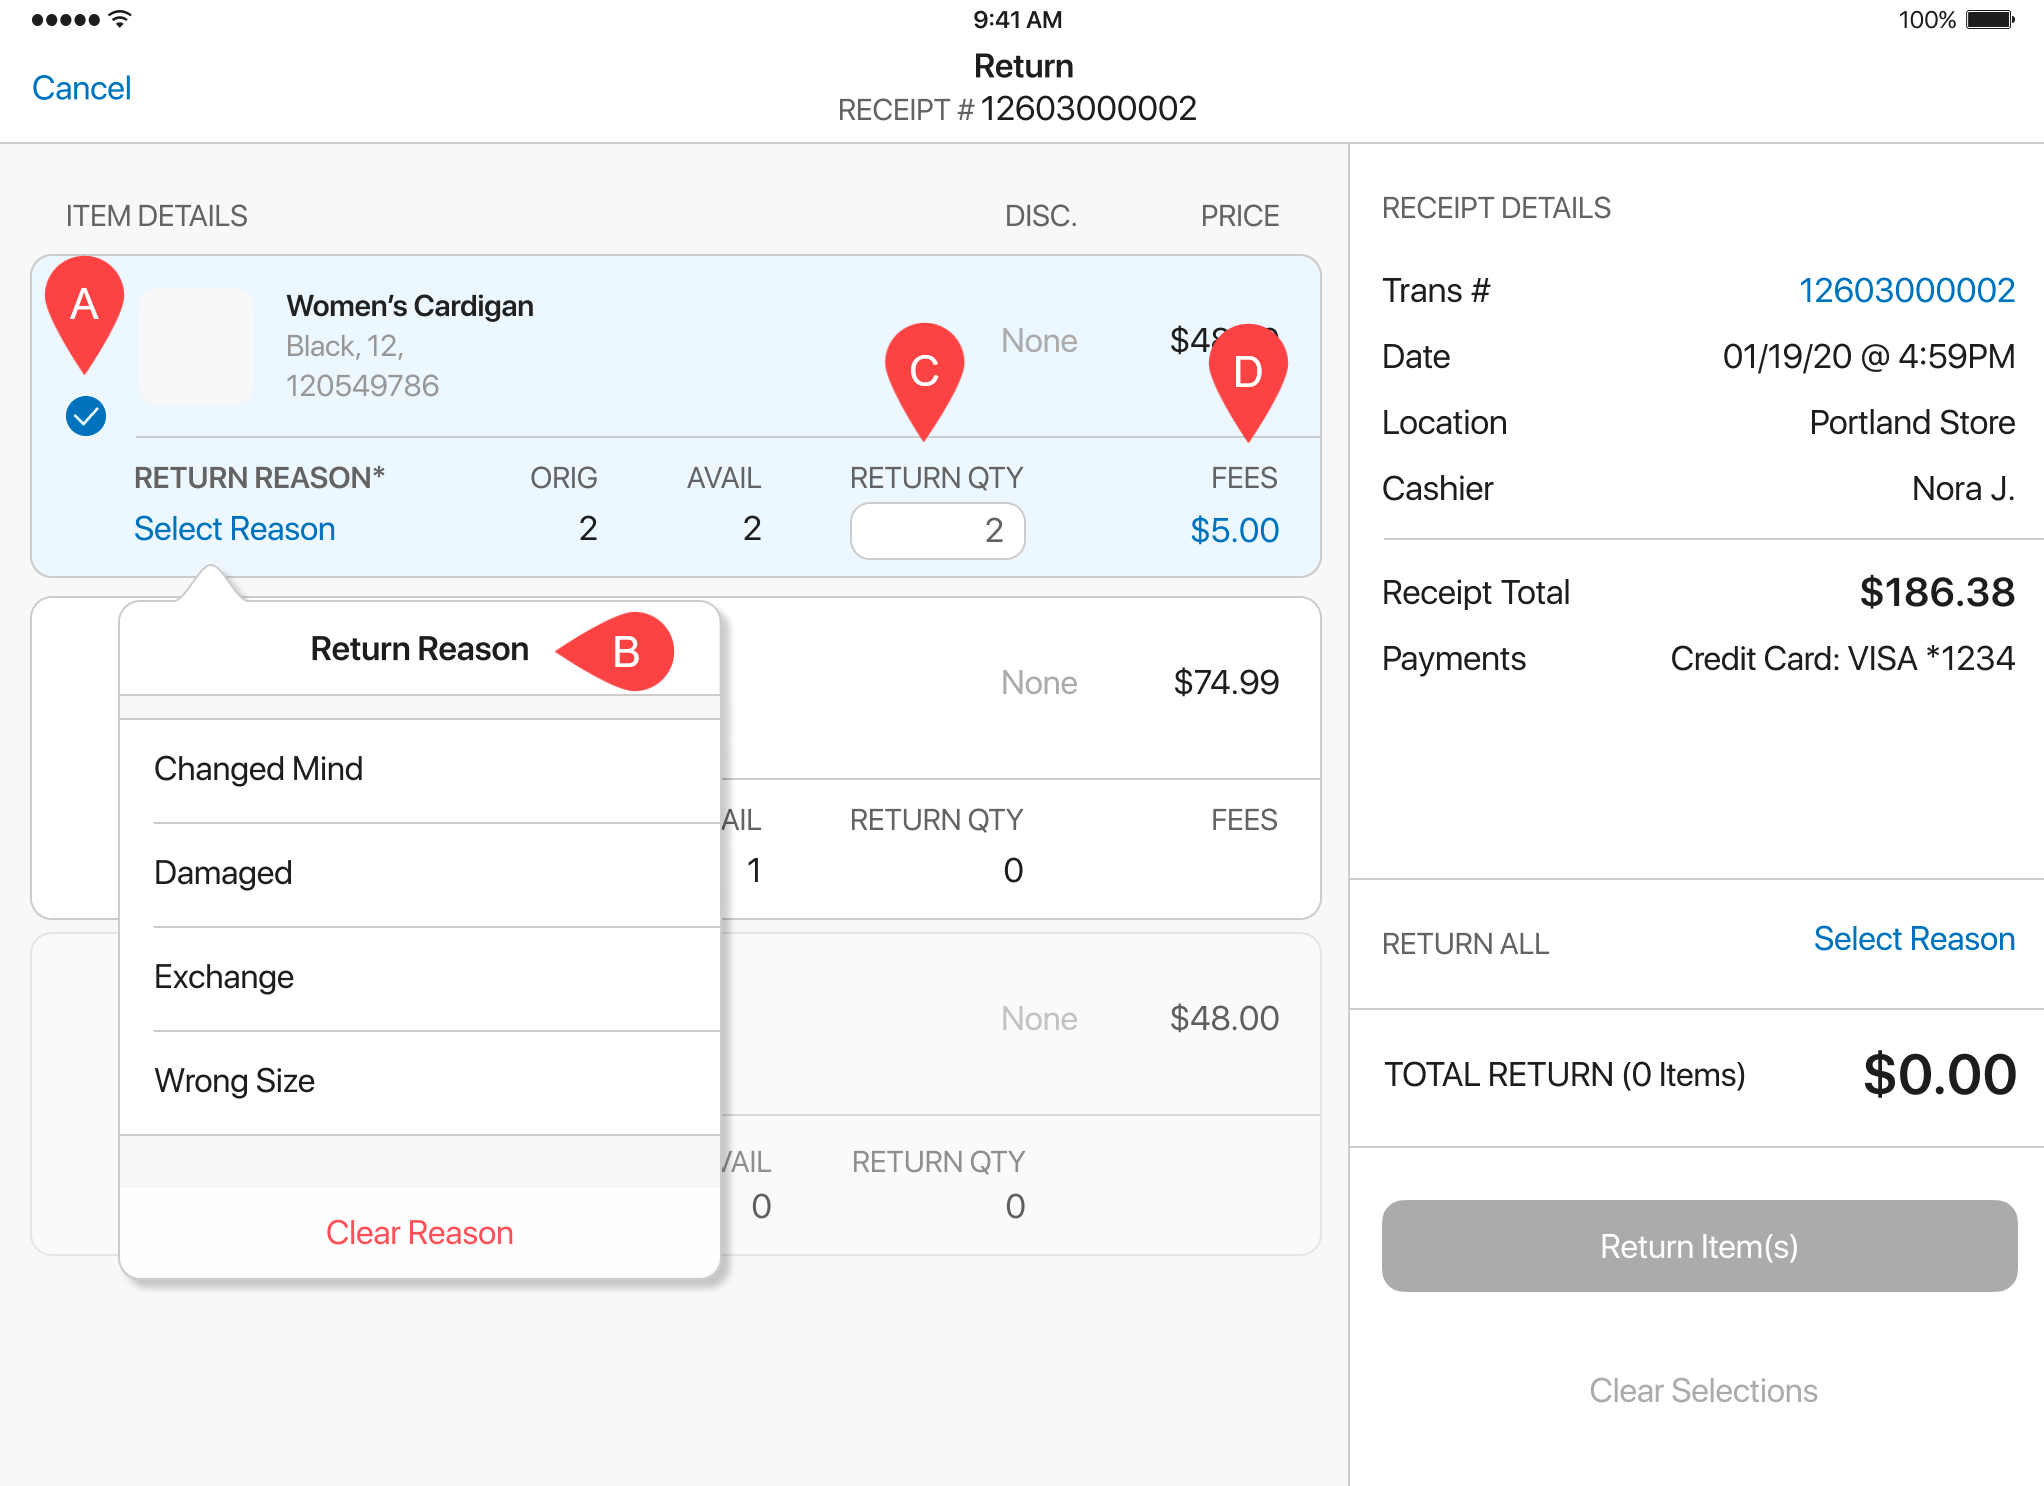
In the Return area that opens:

- Tap the item(s) that should be returned. Items included in the verified return display as blue rows with a checkmark icon A .
- In the Return Reason pop-over that appears, select a return reason B .
- To define the return quantity, tap the RETURN QTY field in an item’s row C .
- To edit the fees that are to be returned, tap the FEES value D .
- When all return items are configured, tap Return Item(s) at the bottom-right.
-
Back in the Sales Receipt area, tap Payment at the bottom-right. In the Payment area, choose the required refund method and complete the refund.
-
Tap Finalize at the bottom-right.