Incoming: Transfer In
Transfer In is used to receive items sent from another location. To update your location quantities, it is required to finalize a Transfer In.
To do so, in POS Pro:
-
Tap Shipments in the app’s Home Screen navigation panel or in the fly-out More menu (the location of the button is defined by your custom settings).
-
In Shipments, tap Incoming at the top of the screen.
-
In the Incoming tab, find the required Transfer In (T-IN) and tap to open it.
If the Transfer In has a carton number, scan it or enter in the search field to find an exact match. Alternatively, scan or enter the number of the associated Transfer Order to see all the Transfers In related to it.
- Tap Items at the top-right of the screen.
Tapping Items will open the list of merchandise that has arrived from another location.
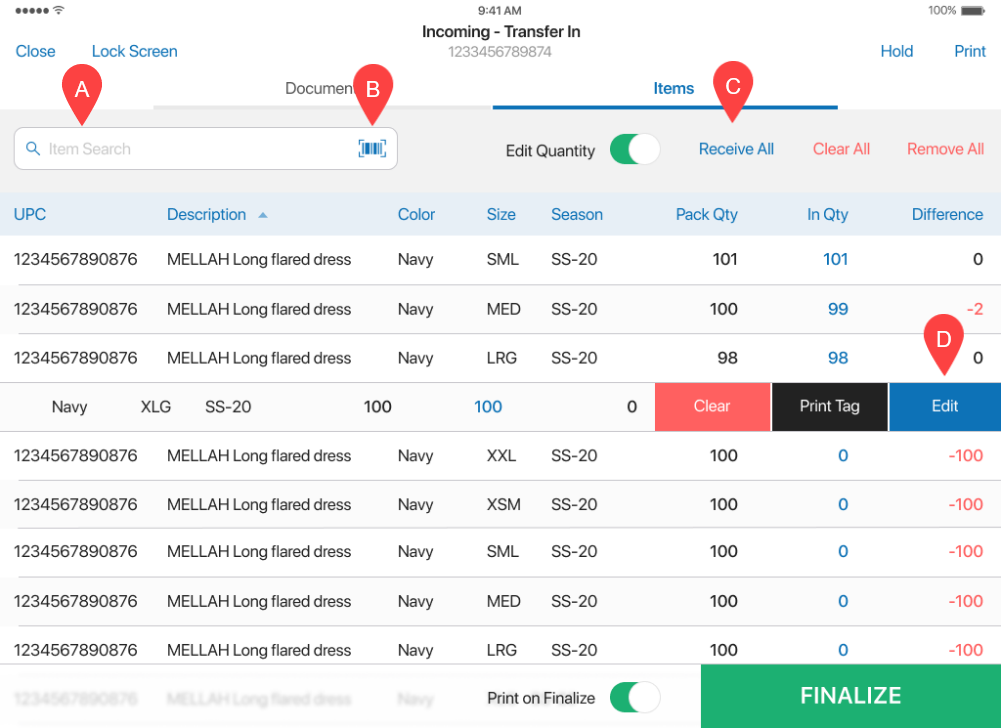
For each item on the list, the Pack Qty column displays what the other location has sent to you.
- Then, you need to receive the items. To do so, perform one of the following:
-
In the Item Search field A enter the item’s UPC, PLU, or ALU
-
Scan the item’s barcode B
Receiving the item using any of the above methods will increase that item’s In Qty value by 1.
Alternatively, to receive all the Transfer In items at once, tap the Receive All button C . Tapping the button will automatically match the values of Pack Qty and In Qty.
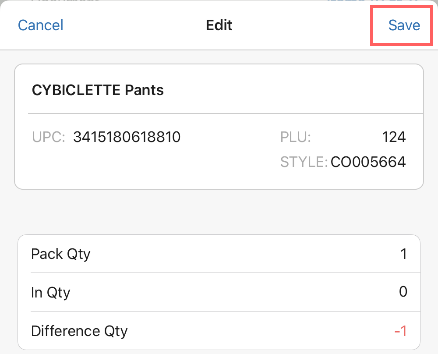
Also, it is possible to change the item’s In Qty manually. To do so, swipe the item row left and tap Edit D . In the Edit dialog that opens, change the In Qty value and tap Save in the top right corner.
- Tap Finalize to update the quantities at your location.